The blogger over at Mouse and the Monorail suggested it was easy -- so I decided to give it a whirl.
Since I was already tie-dying some Mickey shirts -- why not dye a few more? I also decided to try my hand at a patriotic shirt and a sunburst shirt.
Now not everything I did was up to the standards on the Mouse and the Monorail, or any of the other Pinterst pages. For instance -- I didn't soak our shirts in ash before dying them. I actually didn't soak them in anything at all. Ok... here's what I did -- and how they turned out.
First -- I bought some white t-shirts at Michaels. I also bought some Tulip tie-dye paints. These come in various colors -- and various sizes. I have one package that I didn't use for this post that has two bottles, and one other set that has 6. For this project, I used one that had three bottles.
Inside the Tulip container -- you will find plastic gloves and some rubber bands.
Pinocchio Alert -- I'd like to give 4 Pinocchio's to Tulip. First, there's no way there was enough dye in the four bottles to do 9 projects. Second, there's not enough rubber bands in the kits to do 9 projects. More on that in a bit.
Ok - to do the Mouse shirt, first you need to print off a template. I used the one I found here.
Cut out the template.
Put the template on your shirt and outline it. I used a pencil for this part. *my daughter wanted to take pictures of this whole process*
Then grab dental floss and a needle. You need to thread the dental floss through the needle (trust me here) and then sew the outline of the Mickey design.
Now -- here's something they might don't tell you on Pinterest -- dental floss can have knots in it! See the picture above. The first time I tried to do this, I had a piece of floss that had a knot -- and there was no way it was going to work for this project. I had to start again.
Once you are finished outlining the Mouse -- pull it tight and pucker the Mouse piece upwards. this is the piece that you will dye whatever color you want your Mouse to be. Put a rubber band around it.
The blogger at the Mouse and the Monorail dyed hers in a circle design. We decided to do a spiral design. To do so, lay the shirt flat -- then take the middle piece that is sticking up (your Mouse) and start twirling it around and around until you have something that looks like a cinnamon bun.
Take three of the rubber bands and put them around your cinnamon bun
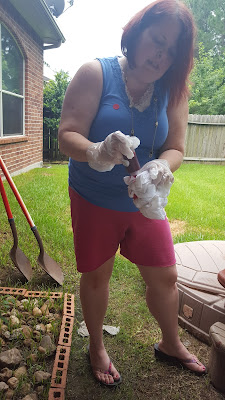
Another "fabulous" pic of me dying our shirts. My daughter was adamant on taking these pics - although I look like a hot mess.
Then the dying begins...... follow the instructions (it only takes water), and have fun. We bagged up our shirts when we were finished and left them for about 18 hours.
Then we took off the rubber bands, pulled out the dental floss, ran them under water until the water ran clear, and washed them in the washing machine with hot water, detergent, and a color catcher.
Our finished product:
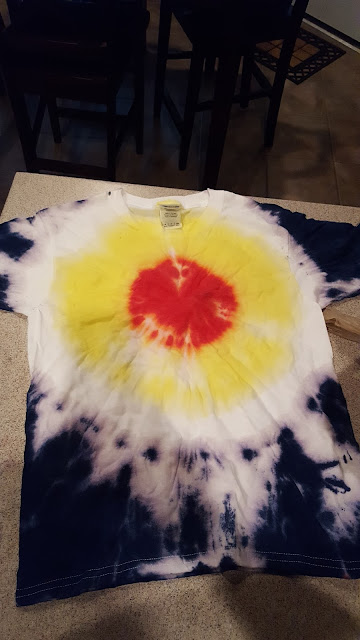
Here are a few others we dyed as well:
Patriotic
Sunburst
Letting them all dry on our stairs
And here we are modeling our new Mickey shirts! I hope you have enjoyed this project -- and that my tips are useful. Happy tie-dying!


No comments:
Post a Comment